Two ways to open the add-care screen
You can start adding a care item from two places in the app:
- From the Today tab — above your day’s task list, there’s an “Add care” row. Tap it. If you only have one pet, you’ll go straight to the add-care screen. If you have more than one pet, a small dialog first asks “Who is it for?” — it lists each of your pets by name, plus a “Not now” option if you want to back out.
- From a pet’s own page — tap “Pets” in the bottom navigation, then tap the pet you want. Above that pet’s list of care items, there’s an “Add” button. Tapping it opens the same add-care screen, already knowing which pet it’s for.
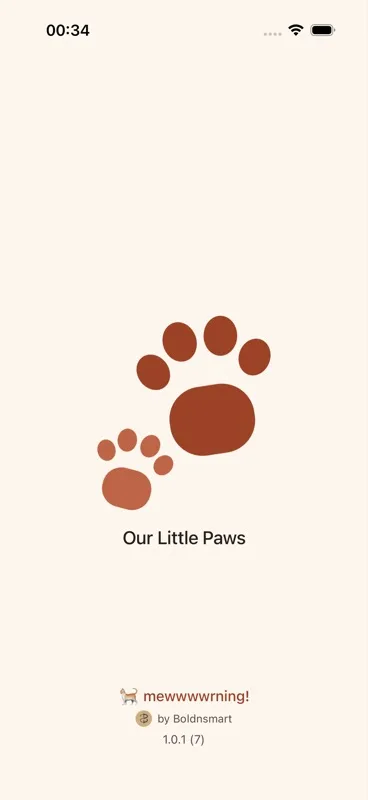
Step 1: Choose what kind of care this is
At the top of the screen, you’ll see a row of category chips you can scroll through sideways. Pick the one that best describes the care you’re adding:
- Everyday (paw emoji) — this is the default category, and it’s where the starter items the app suggested when you first set up your pet live.
- Nutrition (plate emoji) — for food and feeding-related care.
- Sport (game/ball emoji) — for exercise and play.
- Medical (medical emoji) — for health-related care.
- Beauty (scissors emoji) — for grooming.
- “+ New” — if none of these fit, tap this to type your own category name and pick any emoji you like (for example, “Grooming” or “Training”). Once you create it, it appears as its own chip alongside the five built-in categories, and the app remembers it for next time.
If you ticked a category during setup, that category automatically moves to the front of this row so it’s the first thing you see. Nothing is removed if you didn’t tick anything during setup — the categories just stay in their usual order.
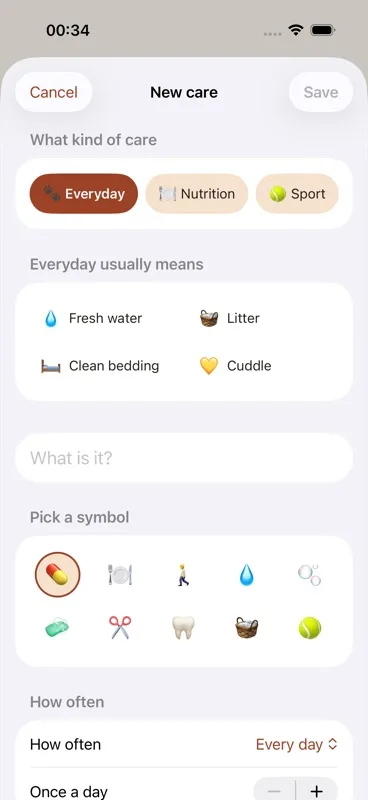
Step 2: Pick a suggestion (or skip this and type your own)
Once you’ve picked a category, a section appears titled “[Category] usually means” with a row of tappable suggestion chips. Tapping one automatically fills in both the name and the symbol for you — you can still change the text afterward if you want something more specific. Here’s every suggestion, by category:
- Everyday: Fresh water, Litter, Clean bedding, Cuddle
- Nutrition: Breakfast, Dinner, Treat, Supplement
- Sport: Walk, Run, Play, Training
- Medical: Medicine, Vaccination, Worming, Flea treatment, Weight check
- Beauty: Brushing, Nail trim, Bath, Teeth, Ears
If you created your own custom category in Step 1, there are no suggestions for it — you’ll just type the name yourself in the next field.
![The "[Category] usually means" section with its row of suggestion chips, for example under Medical: Medicine, Vaccination, Worming, Flea treatment, Weight check.](/assets/img/guides/category-suggestions.webp)
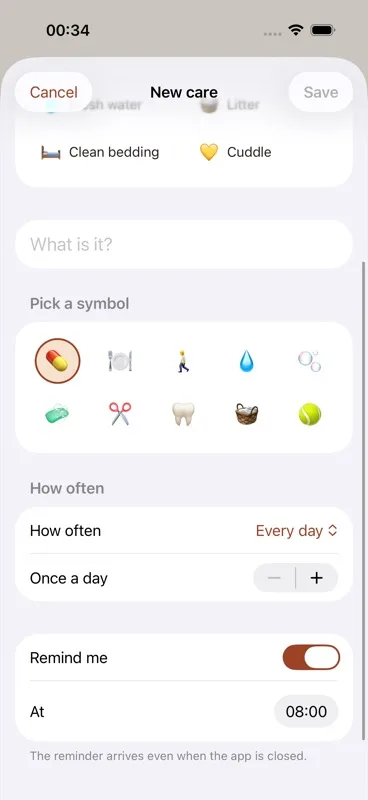
Step 3: Name the care item
Under “What is it?” is a free-text field. If you tapped a suggestion in Step 2, it’s already filled in for you. If you didn’t, or if you want something more specific — like “Give Max his morning pill” instead of just “Medicine” — type it in here by hand.
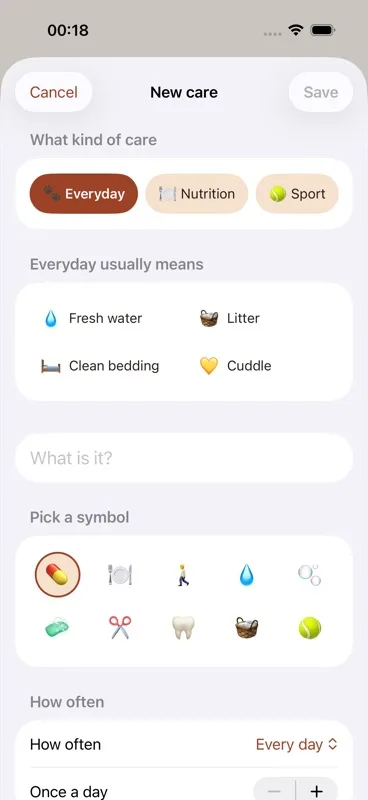
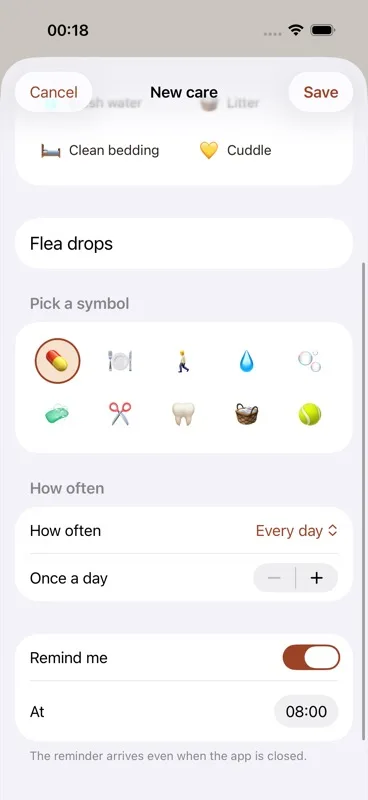
Step 4: Pick a symbol
Under “Pick a symbol” is a grid of 10 emoji you can choose from: medical, plate, walking, water drop, brush, sponge, scissors, tooth, litter, and a game controller. This is separate from whatever symbol a suggestion may have already filled in — pick whichever one actually fits what you’re tracking.
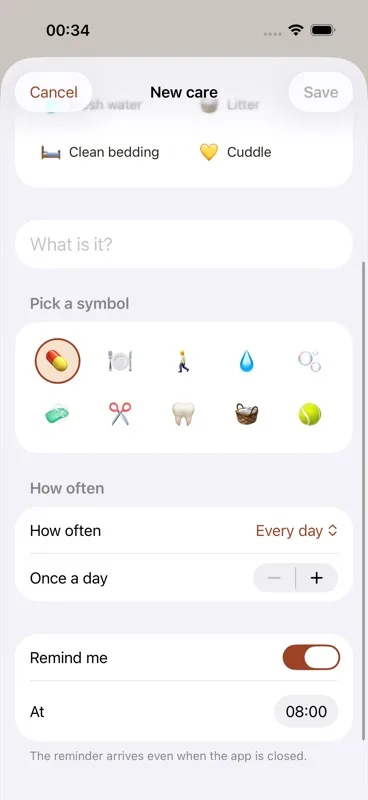
Step 5: Decide how often it happens
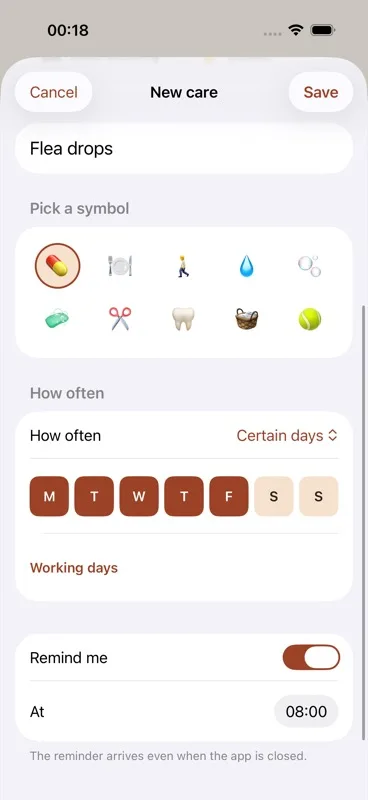
Under “How often,” pick one of six options:
- Every day — reveals a stepper where you choose “Once a day” up to 6 times a day.
- Every few days — reveals a stepper for “Every [N] days,” where N can be anywhere from 2 to 60.
- Weekly
- Monthly
- Once
- Certain days — reveals a row of seven day buttons (M T W T F S S, starting on whichever day your own calendar starts the week), plus a “Working days” button that ticks Monday to Friday in one tap. A care item set to Certain days with no days ticked never comes due.
Step 6: Turn reminders on or off
Below that is a “Remind me” toggle, switched on by default. When it’s on, a time picker appears — “At [hour:minute]” — where you set what time you’d like the reminder to fire each day.
Underneath, a small footer note explains one of two things: if notifications are turned off for the app at the phone’s system level, it tells you that and points you to your phone’s Settings to turn them back on; otherwise, it reassures you that the reminder will still arrive even if the app itself is closed.
![The "Remind me" toggle switched on, the "At [hour:minute]" time picker below it, and the footer note about notifications.](/assets/img/guides/remind-me-toggle.webp)
Step 7: Save it
At the top of the screen, there are two buttons: “Cancel” and “Save.” “Save” stays greyed out and disabled until you’ve typed something into the name field in Step 3 — once there’s a name, it becomes tappable.
Editing or deleting a care item later
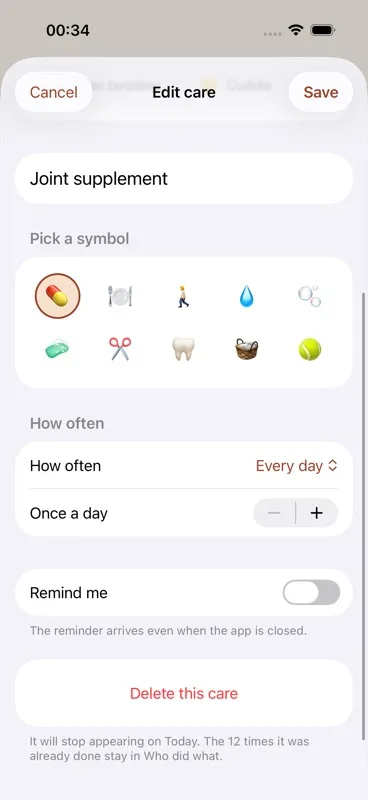
To change a care item after you’ve created it, go to the pet’s own page and tap the care item in the list. This reopens the exact same screen you just used, but pre-filled with everything you set before, and titled “Edit care” instead of “New care.”
At the bottom of the edit screen, there’s a red “Delete this care” button. Tapping it asks you to confirm first. The footer text explains what deleting actually does: it stops the item from showing up on your Today list going forward, but anything you already ticked off for it stays exactly as recorded in Who did what. Nothing you’ve already done gets erased.
Editing is no longer the only way in. Deleting a care item can also be done straight from the Today tab: press and hold the item there and choose “Delete completely” — no need to open Edit at all. See the Today tab guide for the full press-and-hold menu, including “Skip today” for waving off a single occurrence without deleting anything.
You can add as many care items as you like for each pet — this is unlimited on both the free and paid plans.
Next: how the Today tab works — ticking off tasks, and the press-and-hold menu for skipping or deleting one.